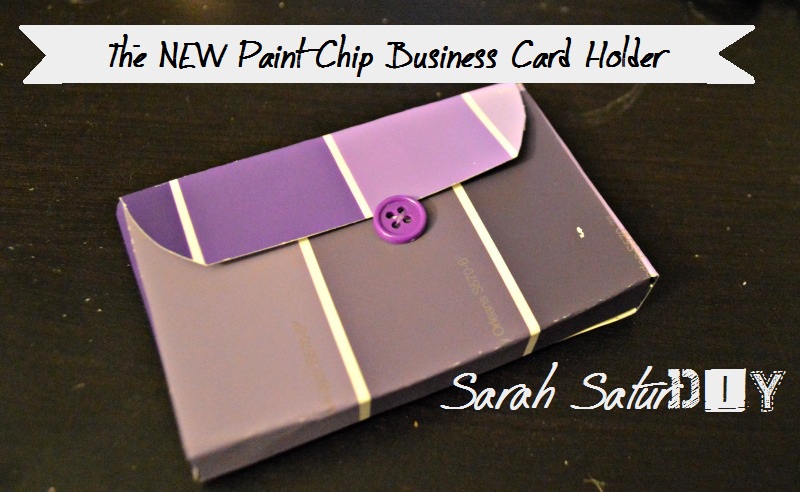
I got business cards for my website! Yeah, woohoo, hooray – hold on! Record scratch! Where am I going to put them? I didn’t think to order a business card holder when I ordered the business cards. I thought, “I’m crafty…I’ll just make a business card holder.”
You see, I had pinned this tutorial for making a paint chip business card holder a while back. The guy who created the tutorial did an awesome job of explaining how he made the paint chip card holder and he even included two different templates that you could print out to fit different sizes of business cards.
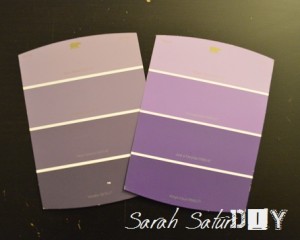
The guy at DesignVerb! (I think Aaron is his name) mentioned that he used Behr paint chips from The Home Depot. Perfect! I go to The Home Depot all the time to get spray paint and other heavy-duty craft supplies. So I went along my merry way and picked up some purple (of course) Behr paint chips from Home Depot. I then printed out the template and started trying to figure things out. That’s when I ran into my problem.
The DesignVerb tutorial was posted back in 2006, and since then, Behr paint chips have apparently gotten smaller. There was no way I was going to be able to make a proper business card holder using that template with my paint chips. So I put my crafty brain to work and figured out how to make it using two of the paint chips.
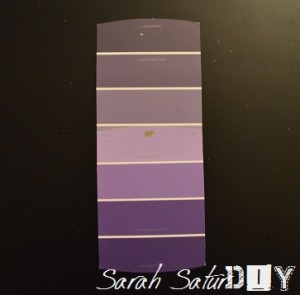
First, I glued together two of the paint chips. I tried to line up the chips and glue them together so it looked like just one long paint chip.
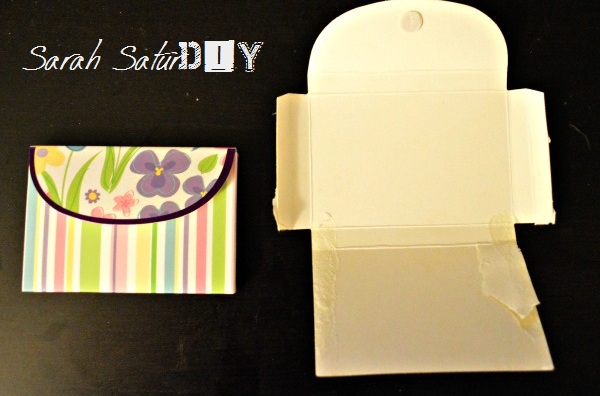
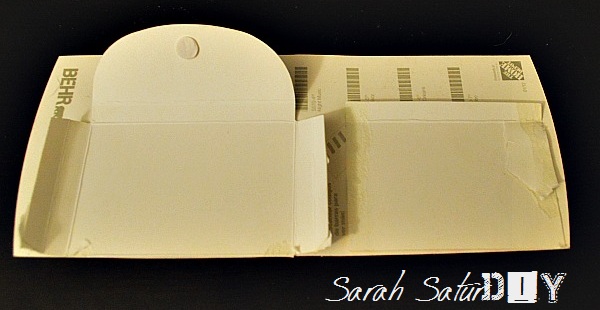
Next I got a gift card holder from the dollar store. The box was the perfect size to be a business card holder, and while I could have just covered the box with the paint chips, I wanted to actually make the box out of the paint chips. These were 2 for $1, so I didn’t feel bad dissembling one of them for my project.
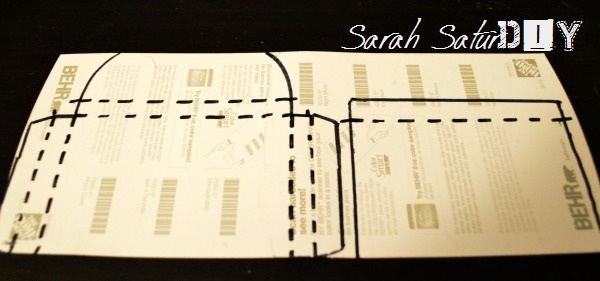
I planned to use the disassembled gift card box as a template, but the glued-together paint chips weren’t big enough to fit the whole thing in one piece. I cut the box in two pieces along the bottom seam and then traced the box onto the paint chip. Where it’s a dashed line it means to fold it (not cut it).
I cut out the template, folded along the dotted lines, and taped the pieces together. Last but not least, I sewed on a button to hold the top in place. As far as the last step, you could probably glue on some velcro or glue two buttons on with a rubber band to hold the two together. It’s a pretty versatile craft. The completed business card holder comfortably holds about 25 business cards.
If anybody wants the template to make the business card holder from paint chips let me know! If enough people request it I’ll put up a template on Google docs.

41 Comments on DIY Paint Chip Business Card Holder
4Pingbacks & Trackbacks on DIY Paint Chip Business Card Holder
-
[…] (6) Paint Chip Business Cards Holders ~ Sarah SaturDIY […]
-
[…] Washi Tape Pens & Pencils from Literary Spring Designs {2} Paint Chip Business Card Holder from Sarah SaturDIY {3} Chalk Frame from Lemon Tree Dwelling {4} Baby Carseat Cover from I Dig […]
-
[…] Paint Chip Business Card Holder from Sarah […]
-
[…] Paint Chip Business Card Holder @Sarah SaturDIY […]

Sarah Lynn
at (12 years ago)I just got business cards and wasn’t sure where to put them. This card holder is ADORABLE! Pinning this idea, I definitely want to make one!
Hannah
at (12 years ago)I love this!! Great idea and I love the design of paint chips. Perfect for a DIY business 🙂 Thanks for posting!
Hannah ♫
Sew Lah Tea Dough
Jackie
at (12 years ago)I love this Sarah! I thought I used paint chips for everything already lol, but I never thought of this one!! I love it…could it be you like purple 😉
Emily
at (12 years ago)Wonderful idea, and a great tutorial! I have lots of unused paint chips lying around!
Abby
at (12 years ago)What a cute idea! Now I’ll have to decide on what colors I want to use… Thanks for sharing!
Angela - My Personal Accent
at (12 years ago)Love this idea! Especially for a DIY blogger who has business cards. It makes a lot of sense.
Lauren
at (12 years ago)That is such a great idea. I have tons of paint chips just laying around. I would love it if you would share this over at my link party. http://www.ifitsnotbaroquedesignblog.blogspot.com/2013/04/tuesday-link-party-13.html
Angelina - JoJo and Eloise
at (12 years ago)Seriously how cool is this!!! I love that you can use different colors!! So Cute.. I would love for you to stop in and share it at our party!! http://jojoandeloise.com/2013/04/knock-our-socks-off-party-3-2/
xo
Angelina
Kei
at (12 years ago)Very cool idea!
Jessica @ Play Trains!
at (12 years ago)What a creative idea! It looks really cool.
Jennifer Dawn
at (12 years ago)What a great way to use the paint simple strips! I’d love for you to stop by my weekly link party and link this up. http://thelifeofjenniferdawn.blogspot.com/2013/04/a-little-bird-told-me-link-party-36.html
Rita
at (12 years ago)Very Creative! I love this idea, thanks for sharing. I need to head to the paint department now.
Erica
at (12 years ago)Thanks for linking up at Thursday Favorite things hop. I would also like to invite you to stop by We Three Crabs on Tuesdays and link up any post that can be pinned for Pinterest Tuesday. This post would be a lovely addition.
the cape on the corner
at (12 years ago)now that is a super smart idea!
Megin
at (12 years ago)Awesome ~ you’re so crafty! LOL! I’d love to see the business card, too.
I’m visiting you today from The Taylor House. I hope you get a chance to stop by my blog and leave a comment and Link Up, too!
~ Megin of VMG206
Medicine Cabinet Makeover
Marilyn
at (12 years ago)This is such a great idea. I never would have thought to make a business card holder from paint sample cards! Super clever
Danielle
at (12 years ago)This is a great idea!!! =) Thank you for linking up at the Pinterest Power Party!!
Danielle
SewMuchCrafting.com
Brooklyn
at (12 years ago)This is DARLING! I can’t wait to make one! I would love to have something cute to whip out of my purse! Saw you on Crafty Blog stalker! Newest follower over here! Feel free to stop by anytime! Can’t wait to see what else you have up your sleeve! xo-Brook
Linda
at (12 years ago)I have to admit.. this is pretty unique. I go by the paint chips at Home Depot and think: “There must be something we can do with these.” Thanks for showing one thing we CAN do with these. Linda
Judy
at (12 years ago)Hi Sarah,
This is very cute and I love the colors too. It is so nice of you to share the template. Great Job!
How about sharing this at Pin It Monday Hop Where you pin and get pinned (LINK)? You can share up to 4 post. If you get a chance, I’d love for you to stop by and join us. I hope to see you there.
Judy
http://www.pursuitoffunctionalhome.com/
http://www.kusinaniinday.blogspot.com/
rebecca
at (12 years ago)great tutorial! thanks for linking up.
Katherines Corner
at (12 years ago)clever! Thank you for sharing at the hop, your participation makes the hop extra special. Big Hugs P.S. the new giveaway posted yesterday!
Shannon@Hoybycrafts
at (12 years ago)These are awesome…not to mention free! I love it! Thanks for sharing!
Gail@Purple Hues and Me
at (12 years ago)This is so creative and inspiring! Imagine the possibilities. I especially like that you used PURPLE cards to make this. I saw this at a linky party and had to click on it!
Marisa
at (12 years ago)That is such a cute idea. I found you on Under the Table and Dreaming and I am a new follower. Come on over.
Christine
at (12 years ago)Absolutely WONDERFUL!!!
Thanks so much for sharing this at The DIY Dreamer… From Dream To Reality! I can’t wait to see what you link up tomorrow evening!
Cindy
at (12 years ago)Love paint chips..great idea!
Home Coming
at (12 years ago)So fun! I’d love if you’d link up to The DIY’ers. http://homecomingmn.blogspot.com/2013/04/the-diyers-and-more-curtains.html
Holly @ EatGreatBEGreat
at (12 years ago)What a fantastic idea! I love it!
Judy
at (12 years ago)What a super cute and clever idea. I will be featuring it tonight at my Swing into Spring party that opens at 8pm EST. Please stop by and pick up an I’ve Been Featured button. Thanks.
Kathy Moody
at (12 years ago)What a great idea! It is adorable. Great tutorial, too! Thank you so much for sharing at A Bouquet of Talent this week! Enjoy the rest of your week. 🙂
hugs
Kathy
Katie
at (12 years ago)Thank you for sharing your project with us at A Crafty Soiree! I’ve been to two different blogger conferences and I have to say business cards and the way you present them can really make an impression and be a good conversation starter. These are especially fun for when DIY bloggers get together. Love it! I’ve featured yours in this weeks and I hope you’ll come by to see it and share more of your crafty skills!
jon
at (11 years ago)Great idea and I love the design of paint chips.
I want to make such a beautiful business card holder for my mother.
thanks for your post again.
mike
at (11 years ago)Thanks very much for your posts here.
Jeanetta Linville
at (8 years ago)Do you have a template of this anywhere for print? Awesome idea. I bought these gift boxes from the dollar tree a long time ago and have been searching everywhere to find them again to buy without luck!
Sarah
at (8 years ago)Sorry, at this time I don’t have a template.
Perfectcraftsgifts
at (5 years ago)Great tips, Thanks very much for your posts here.